Dota 2 for Beginners: What to Learn First
A step-by-step learning path for new Dota 2 players: hero choice, last hitting, the shop and courier, the minimap, TP scrolls, buyback and high ground.
Dota 2 has a reputation as one of the hardest games to learn, and it is not undeserved. There are more than 120 heroes, hundreds of item interactions and many mechanics that the game does not fully explain. The good news is that you do not need to know most of that to start enjoying it. Experienced players did not learn everything at once; they learned a few important things first, and the rest followed through playing.
This guide lays out a learning path in order of importance. Each step builds on the one before it, and none of the advice depends on a particular patch. If you are completely new to the genre, our introduction to MOBAs is a helpful starting point.
Step 1: Use the Built-In Learning Tools
Before jumping into matches with real players, spend some time with the tools the client offers.
- Tutorials. The client’s learning section walks through movement, attacking, abilities, items and the basic goal of the game. It will not make you good, but it removes a lot of early confusion.
- Bot matches. You can play against computer-controlled bots at different difficulty levels. Bots are a low-pressure way to learn a hero’s abilities and practice last hitting.
- Demo Hero mode. This sandbox lets you try any hero, spawn creeps, level up instantly and test items. It is ideal for learning what a hero’s abilities do and how far they reach.
- Turbo mode. Turbo is a faster version of All Pick with more gold and experience, weaker towers and faster respawns. Games are shorter and mistakes are less costly, which makes it popular for trying new heroes, though it does not teach laning as well as normal games.
- Unranked All Pick. The standard mode, without ranked points at stake. This is where most of your learning happens.
Ranked matchmaking has extra requirements. Since 2017, Valve has required players to link a unique phone number to their account before playing ranked. There is no rush to play ranked; it is more rewarding once you understand the basics.
Step 2: Pick a Few Simple Heroes
The first big decision is what to play. With so many heroes, it is tempting to try a new one every game, but that slows learning dramatically. Instead, choose two or three heroes with straightforward abilities and play them repeatedly.
Heroes often recommended for beginners include:
- Wraith King: a durable melee carry with a stun and a passive that revives him after death.
- Sniper: a long-range attacker who teaches positioning and last hitting.
- Ogre Magi: a very durable support with a stun and a buff for allies.
- Lion: a support with strong disables and a powerful single-target ultimate.
- Viper: a sturdy ranged hero who wins many lanes with simple abilities.
Also decide on a position. Dota numbers its roles from 1 (carry, most farm) to 5 (hard support, least farm), and each comes with different responsibilities. Our guide to Dota 2 positions explains them in detail. Many beginners find position 5 support a good starting role, because support heroes stay useful even when behind, and you learn the map by watching it.
Step 3: Learn Last Hitting and Denying
Gold in Dota comes mostly from creeps, and you only get gold for a creep if you land the last hit, the attack that kills it. This is the single most important mechanical skill in the game.
Dota adds a twist: you can attack your own creeps when their health is low and kill them yourself. This is called denying. A denied creep gives the enemy no gold and reduced experience. Denying slows your opponent’s growth while you grow normally.
How to practice:
- Open Demo Hero mode or a bot game with a simple ranged hero.
- Watch the health bars of enemy creeps and time your attack so it lands as the creep’s health drops below your damage.
- When your own creeps are low, try to deny them.
- Track your last hits and denies on the scoreboard and aim to improve each session.
Even a few short sessions make a big difference. Better last hitting means faster items, and faster items make every other part of the game easier.
Step 4: Understand the Shop, Couriers and Items
Items make heroes stronger, and buying the right ones at the right time is a large part of Dota. A few basics:
- The main shop is in your base. You can browse it from anywhere, and items you buy while away from base go to your stash.
- The courier is a small flying or walking unit that carries items from your stash to you. Every player has their own courier, so you can send items without walking home.
- The secret shops sell a few advanced components and are located away from the bases. The shop interface marks which items come from there, so you know when a component needs a special trip or a courier run.
- Recipes combine components into stronger items. The shop shows what each item builds into.
- Consumables such as healing salves, clarities and tangoes keep you in lane longer.
- Neutral items are a separate category of items gained during the game from the neutral system rather than the shop. They go into a dedicated slot and offer extra effects.
For your first games, rely on the in-game hero guides, which suggest item builds for each hero and are written by the community. As you learn, you will start to adjust builds based on the enemy team.
Step 5: Watch the Minimap
The minimap in the corner of the screen shows allied heroes, visible enemies, towers and creeps. Glancing at it every few seconds is a habit that saves many lives.
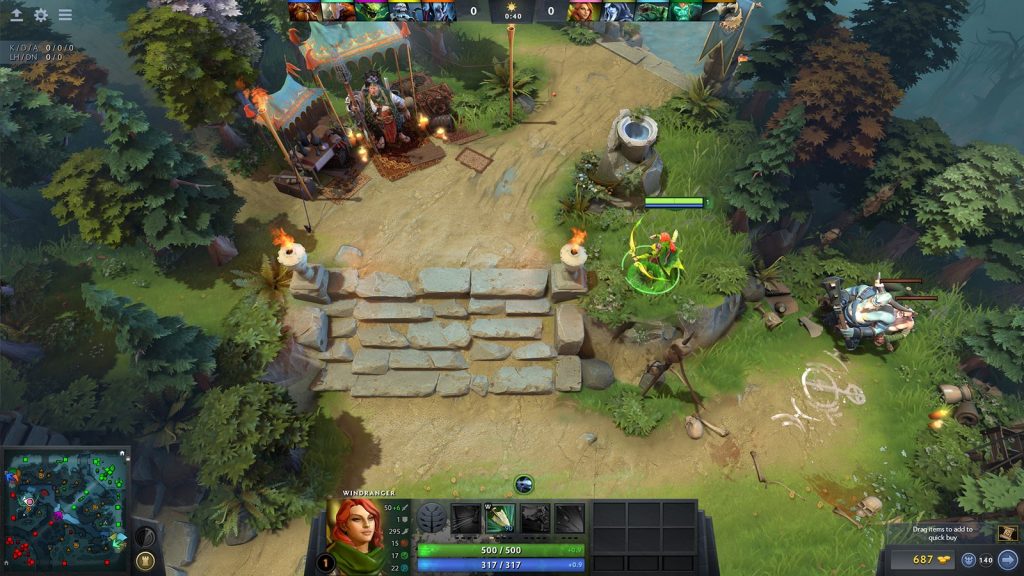
- If several enemy heroes disappear from the map, assume they might be coming toward you and play more safely.
- If an enemy hero appears in another lane, your lane may be safer for a while.
- Your team’s wards reveal areas of the map; areas without vision are covered by fog of war.
Dota’s map also has a day/night cycle. At night, most heroes see less of the map, which makes ambushes easier. Some heroes become stronger at night.
Step 6: Use Teleport Scrolls
Every hero has a Town Portal Scroll (TP) in a dedicated slot. Using it teleports you to an allied building after a short channel. TPs let you:
- return to lane quickly after going back to base,
- help defend a tower under attack,
- join a fight elsewhere on the map,
- escape a dangerous situation, if you can finish the channel.
Beginners often forget to keep a TP ready. Make it a habit to always have one, and watch the map for chances to use it. Later, some players buy Boots of Travel, which work like reusable teleports.
Step 7: Know About Buyback and High Ground
These two concepts become important in the late game.
Buyback
When your hero dies, you normally wait to respawn. Buyback lets you pay gold to respawn immediately. It has a cooldown and its cost grows as the game goes on. Late in a game, buyback can decide everything: a team that wins a fight but faces enemies buying back may have to retreat. Cores in particular should keep enough gold for buyback in the late game.
High ground
Each base sits on high ground, a raised area accessible by ramps. Units on low ground cannot see up onto high ground without vision, while defenders on high ground can see down. This makes attacking a base difficult. The barracks on high ground are crucial: destroying them makes your lane creeps much stronger, and destroying all of them gives “mega creeps.” Taking high ground often requires an item advantage, a good push timing or the Aegis from Roshan; our Roshan guide explains why.
What You Can Safely Ignore at First
To keep the learning curve manageable, here are things you can leave for later:
- the exact numbers behind every hero’s abilities,
- advanced techniques such as creep pulling and camp stacking,
- the details of every item interaction,
- rune timings beyond knowing that runes spawn and are useful,
- hero matchups beyond your own small pool.
These matter, but they matter more after the basics are automatic.
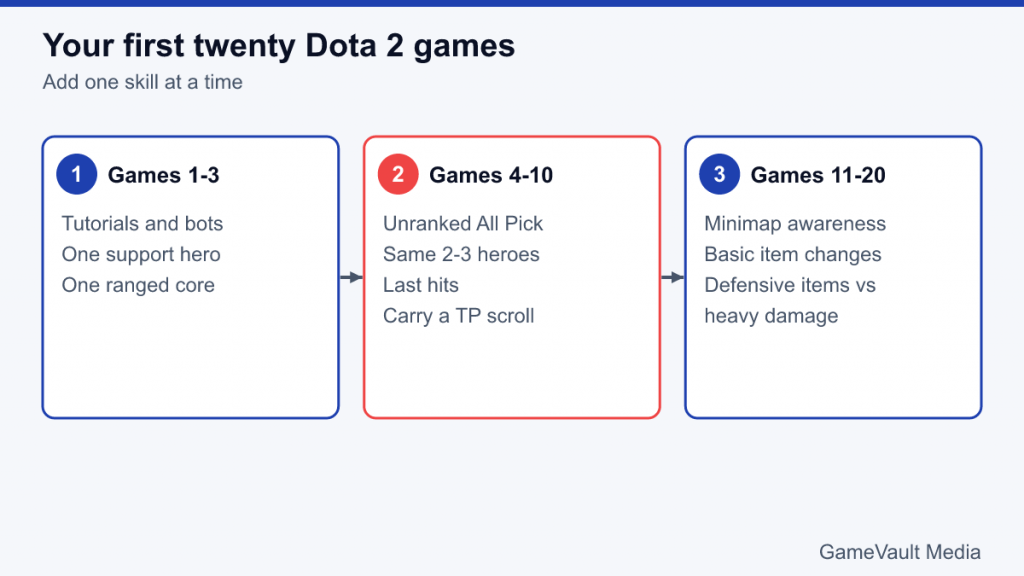
A Simple Plan for Your First Twenty Games
- Games 1–3: tutorials and bot matches with one support and one ranged core hero.
- Games 4–10: unranked All Pick with the same two or three heroes. Focus on last hits and keeping a TP scroll.
- Games 11–20: add minimap awareness and basic item adjustments, such as buying defensive items against heavy damage.
Mix in Turbo games when you want to try something new without a long commitment, but return to normal games for steady learning.
Habits That Help
Focus on one improvement per session. For example, concentrate on last hitting one evening and on minimap awareness the next.
Review your deaths. After a game, think about why you died. Most deaths come from a few recurring causes: overextending without vision, ignoring the minimap, or fighting when your team is not with you.
Mute when needed. Dota players can be harsh. The game lets you mute chat and voice from other players, and doing so often makes the experience more enjoyable.
Be patient. Expect your first dozens of games to feel overwhelming. Every experienced player went through this stage.